
Looking for a versatile and chic hairstyle that works for any occasion? The double French braid ponytail is a perfect choice! Whether you’re getting ready for prom, a casual day out, or a formal event, this braided hairstyle adds elegance and structure to your look.
It’s especially flattering for those with longer hair, layers, or even bangs, offering a seamless blend of style and functionality. In this step-by-step tutorial, you’ll learn how to master the double French braid ponytail with ease, making it a go-to option for any hair type. Let’s get started!
Comprehensive Double French Braid Ponytail Tutorial
Master the art of creating a stunning Double French Braid Ponytail with this detailed guide. This elegant yet practical hairstyle is perfect for various occasions, from casual outings to formal events.
What You’ll Need:
- Paddle hairbrush
- Fine-toothed comb
- Hair ties (small clear elastics and a larger one for the ponytail)
- Bobby pins
- Texturizing spray (optional)
- Hair spray
- Shine serum (optional)
Step 1: Prepare Your Hair
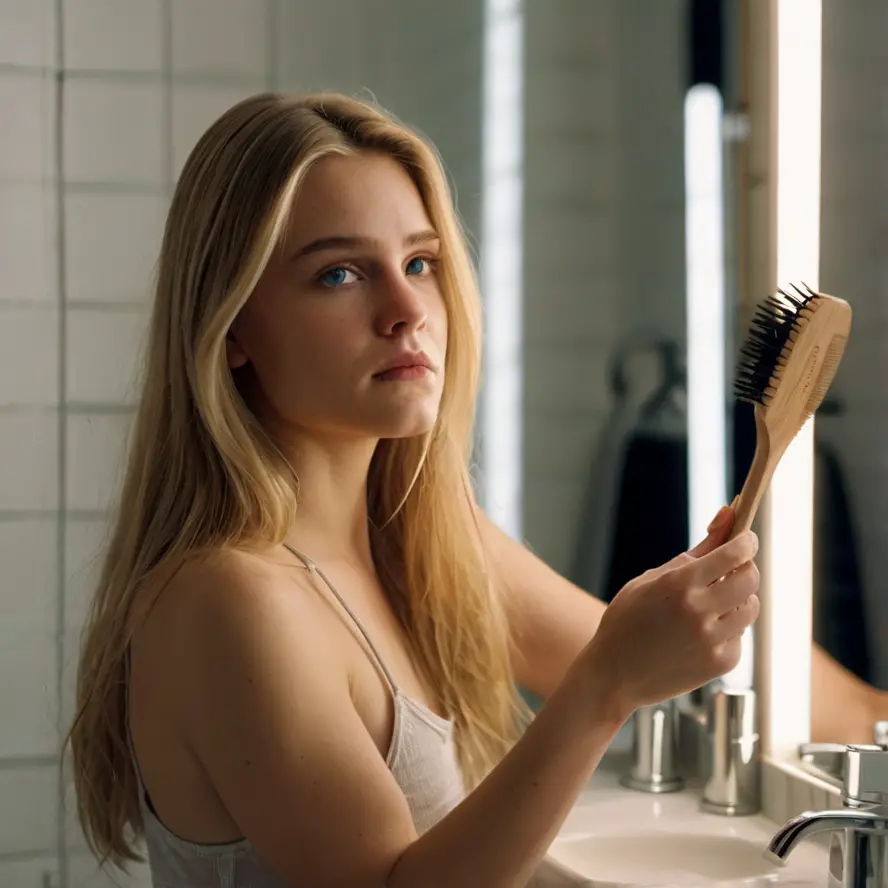
Tangle and knot all hair strands and thoroughly brush it. Remove hair from the ends to prevent breakage and mid-shaft pulling. If hair was just washed, consider using freshly added texturizing spray, deodorant, gel or any sticky material for better grip and hold.
Pro Tip: This style works perfectly on day two, using yesterday’s hair as it offers better texture and grip.
Step 2: Part Your Hair
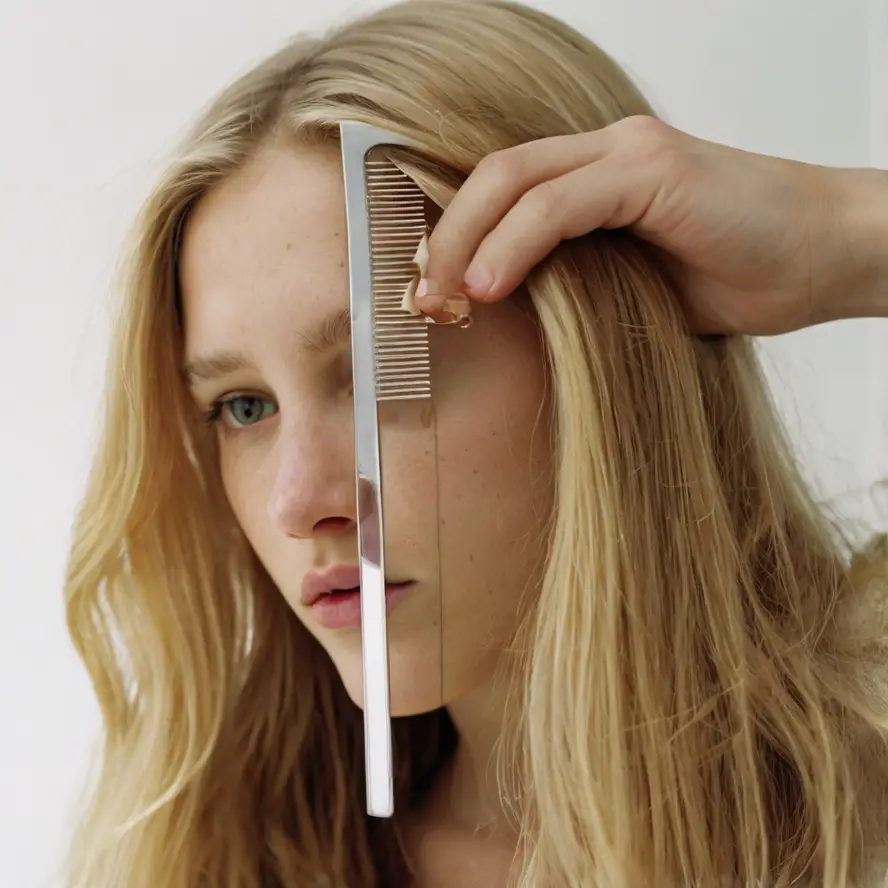
Employ the fine-toothed comb to part your hair exactly from the forehead to the nape of the neck. Ensure the straight part cleanly divides the hair into two equal sections. This step is exceedingly important because it determines the fundamental structure of the entire hairstyle.
Technique: One can achieve the desired straight part/section by positioning the comb at the middle of the nose and pulling it backward across the scalp.
Step 3: Section Off One Side

To maintain order in your workspace, consider clipping back one half of your hair. Try to avoid making indentations in your hair by using a soft scrunchie or a large hair clip.
If you have particularly thick hair, you may prefer to section each side into upper and lower portions for ease of management.
Step 4: Start the French Braid
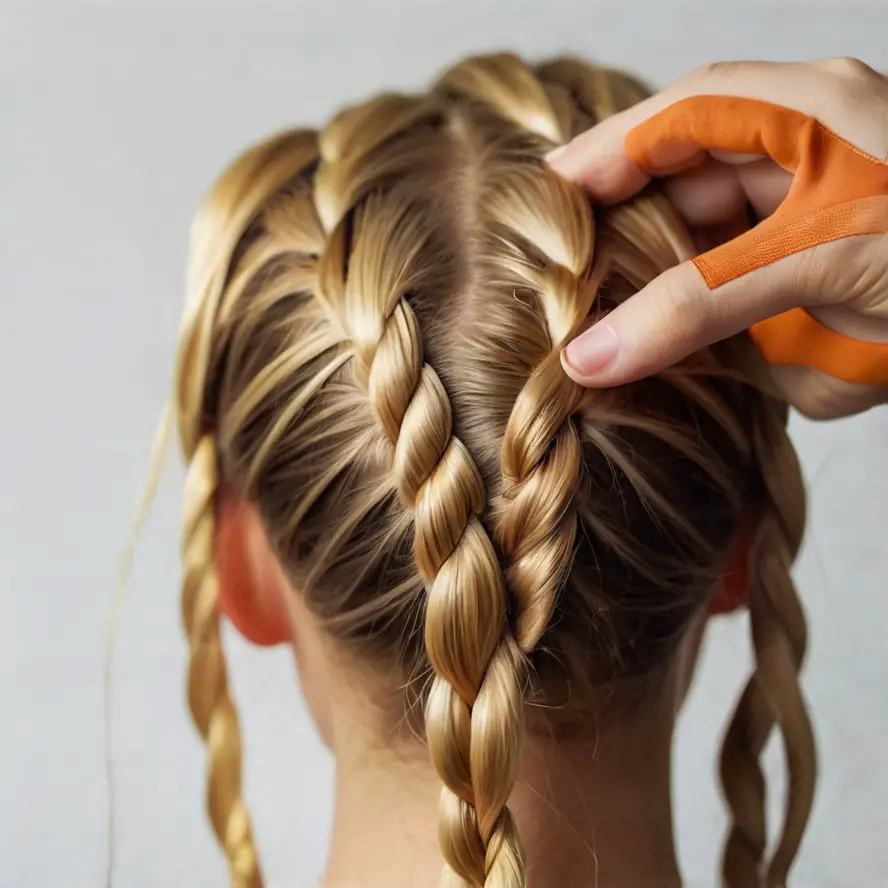
Commence the French braid on one of the tops, near your hairline. Grab a part of the hair near your scalp which is roughly 1 to 2 inches wide and partition it into three equal sections.
Method: Take the right strand in your right while the left strand goes to your left hand. The middle strand should go to reference thumb/index of either hand.
Step 5: Braid and Incorporate Hair
Start braiding by crossing the right strand over the middle, then the left strand over the new middle. As you braid, incorporate new hair from along the hairline and the back of your head with each cross-over.
Key Points:
- Keep the braid tight and close to the scalp for a neater look.
- Try to incorporate equal amounts of hair with each cross-over.
- Angle your hands slightly downward to guide the braid towards the nape of your neck.
Continue this process until you reach the nape of your neck.
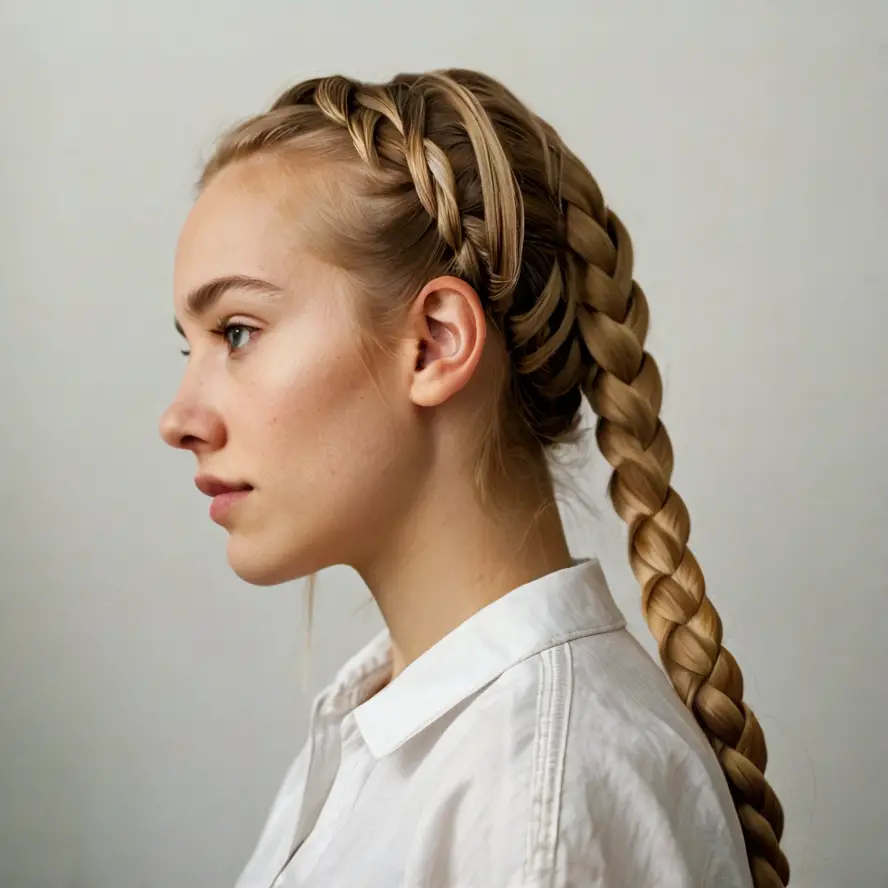
Step 6: Finish the Braid
Once you’ve reached the nape of your neck and incorporated all the hair on that side, continue braiding the remaining hair as a regular three-strand braid. Keep the braid tight and neat all the way to the ends.
Tip: If you have layers or shorter pieces that fall out, secure them with bobby pins as you go.
Secure the end of the braid with a small, clear elastic band. If your hair is very long, you might want to tie it off a few inches from the end to prevent it from unraveling.
Step 7: Repeat on the Other Side
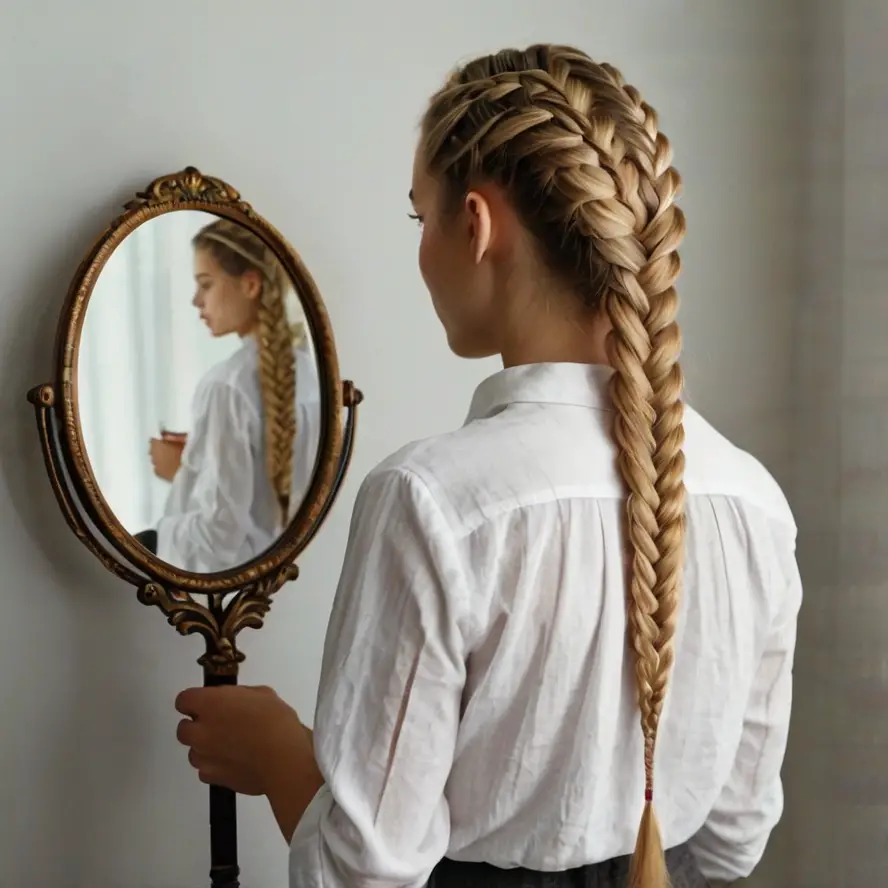
Complete the second French braid by unclipping the other part of your hair and following steps 4-6. Make sure to make this braid as balanced and symmetrical as possible to the first one.
Tip: A combination of a hand mirror and your primary mirror can provide a vantage point necessary to analyze symmetry and cleanliness in the back of your head for any discrepancies.
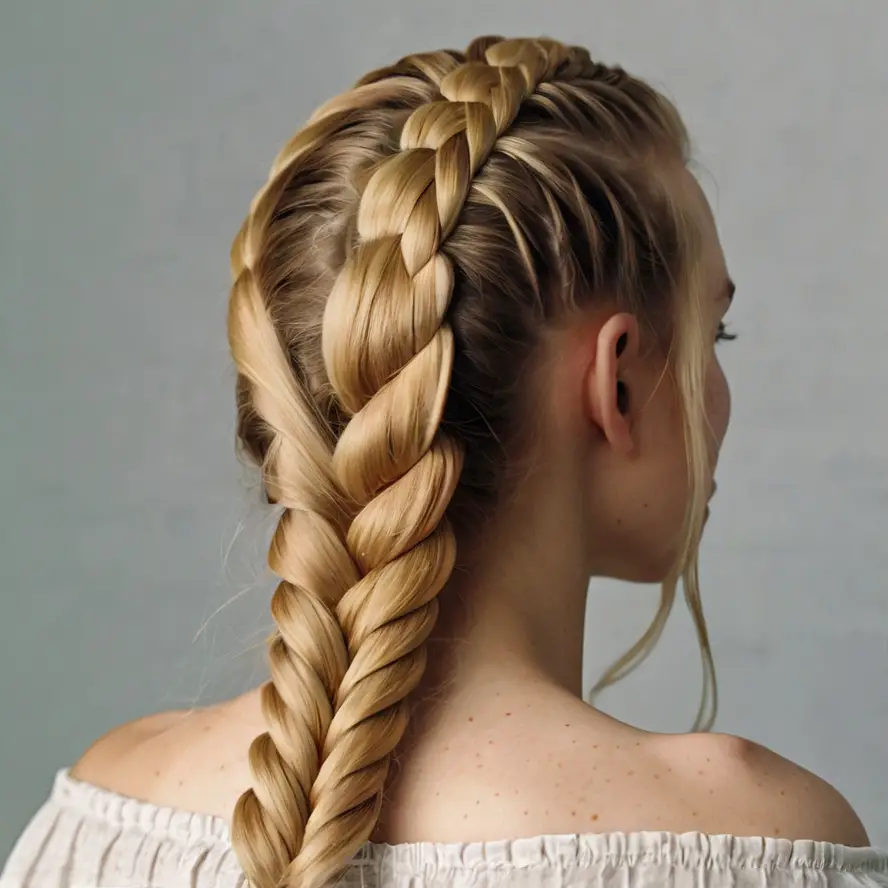
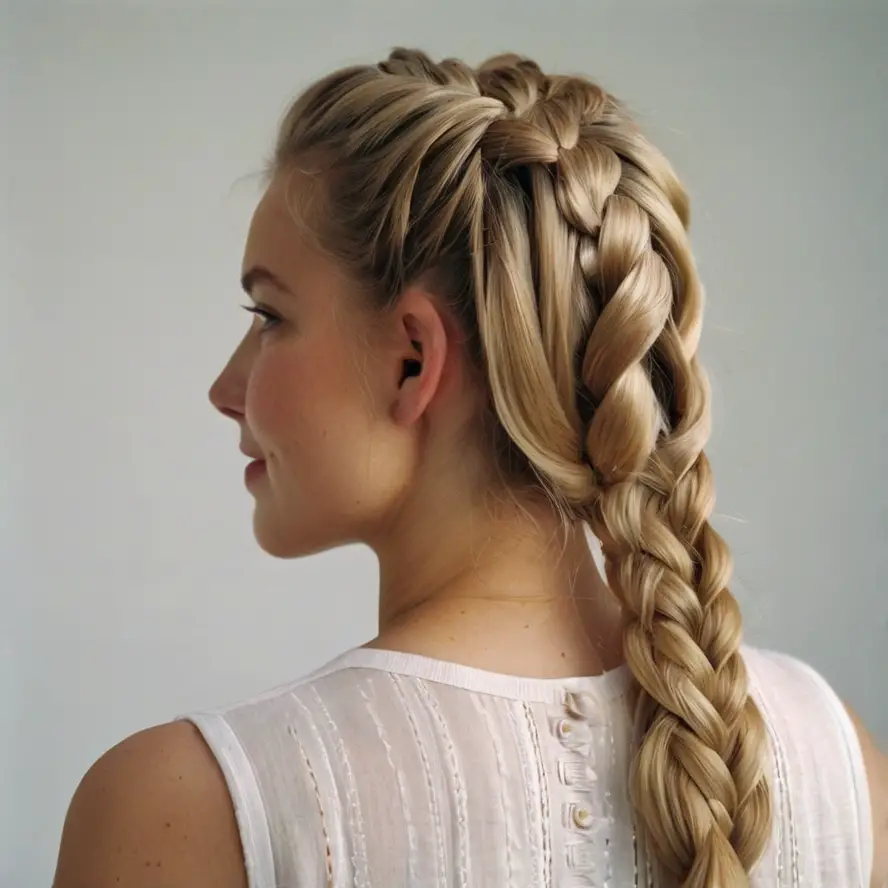
Step 8: Create the Ponytail
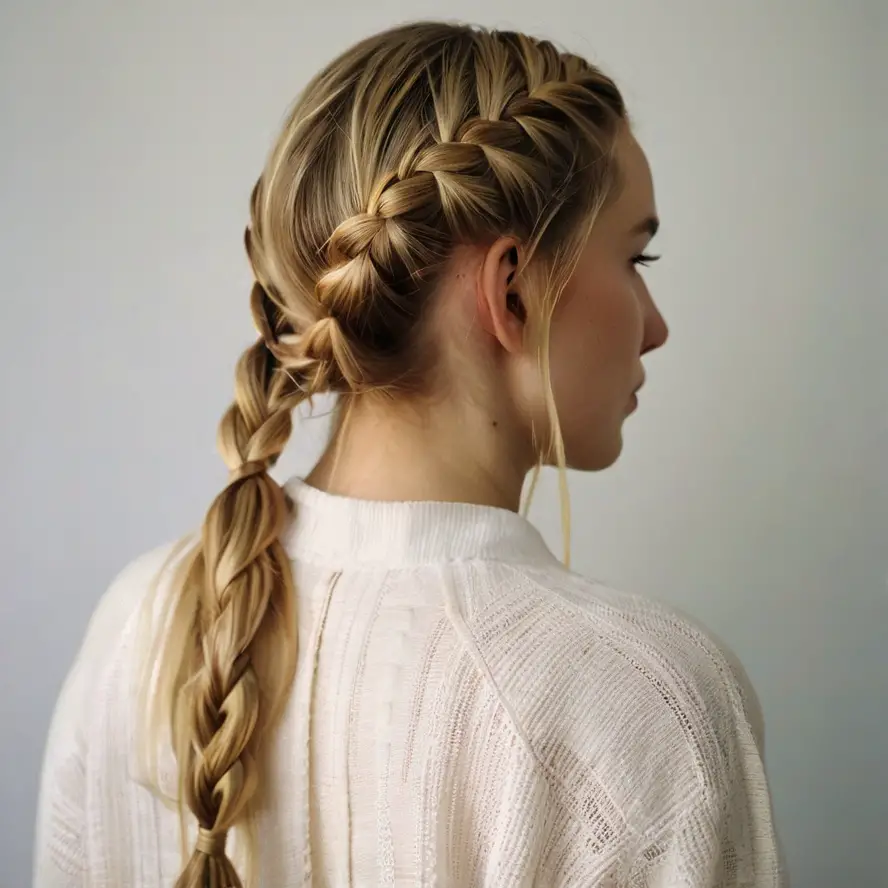
Carefully collect both braids along with the loose strands at the back of your neck. Form a ponytail without allowing the braids to untwist or loosen.
Technique: With one hand holding the braids, smooth out any lumps and loose strands with the other hand. Tie the ponytail with a hair tie that complements the color of your hair.
Tip: For an enhanced refined finish, take a small subsection of hair from the ponytail and wrap it around the hair tie, pinning it underneath with a bobby pin.
Step 9: Finishing Touches
Pull lightly on the edges of your plaits as this will loosen them. This will make the hairstyle softer, more romantic, and create the illusion of fuller hair to those with fine strands.
Use some bobby pins to hold any free strands down or smooth out any flyaways.
For a sleeker look, apply a small amount of shine serum to the ponytail.
Use hairspray to keep the style fixed in place. Hold the can at least 12 inches away and spray in a light, even layer which will provide the most seamless look.
For an exceptional touch of elegance, a jeweled clip can be used or one can also tie a silk ribbon around the base of the ponytail to conceal the band what’s underneath.